Overview
A DNN extension can contain a module, a theme, or other components that extend the functionality of the DNN Platform.
In this article, you will learn how to install an extension in your system.
Environment
- DNN Platform
- Evoq Content
- Evoq Engage
Prerequisites
You need a host/superuser account to be able to perform the steps outlined in this article.
- Hosts have full permissions to all sites in the DNN instance.
- A host account is required to upload modules and themes because they might contain executable code (an administrator account is sufficient to apply modules and themes to a website).
Process
-
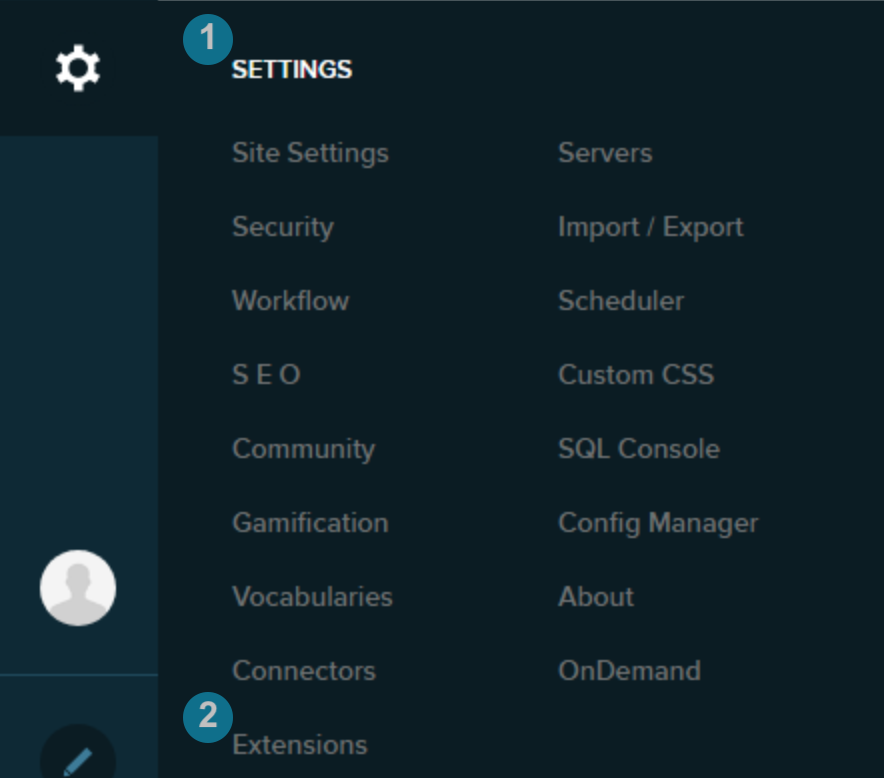
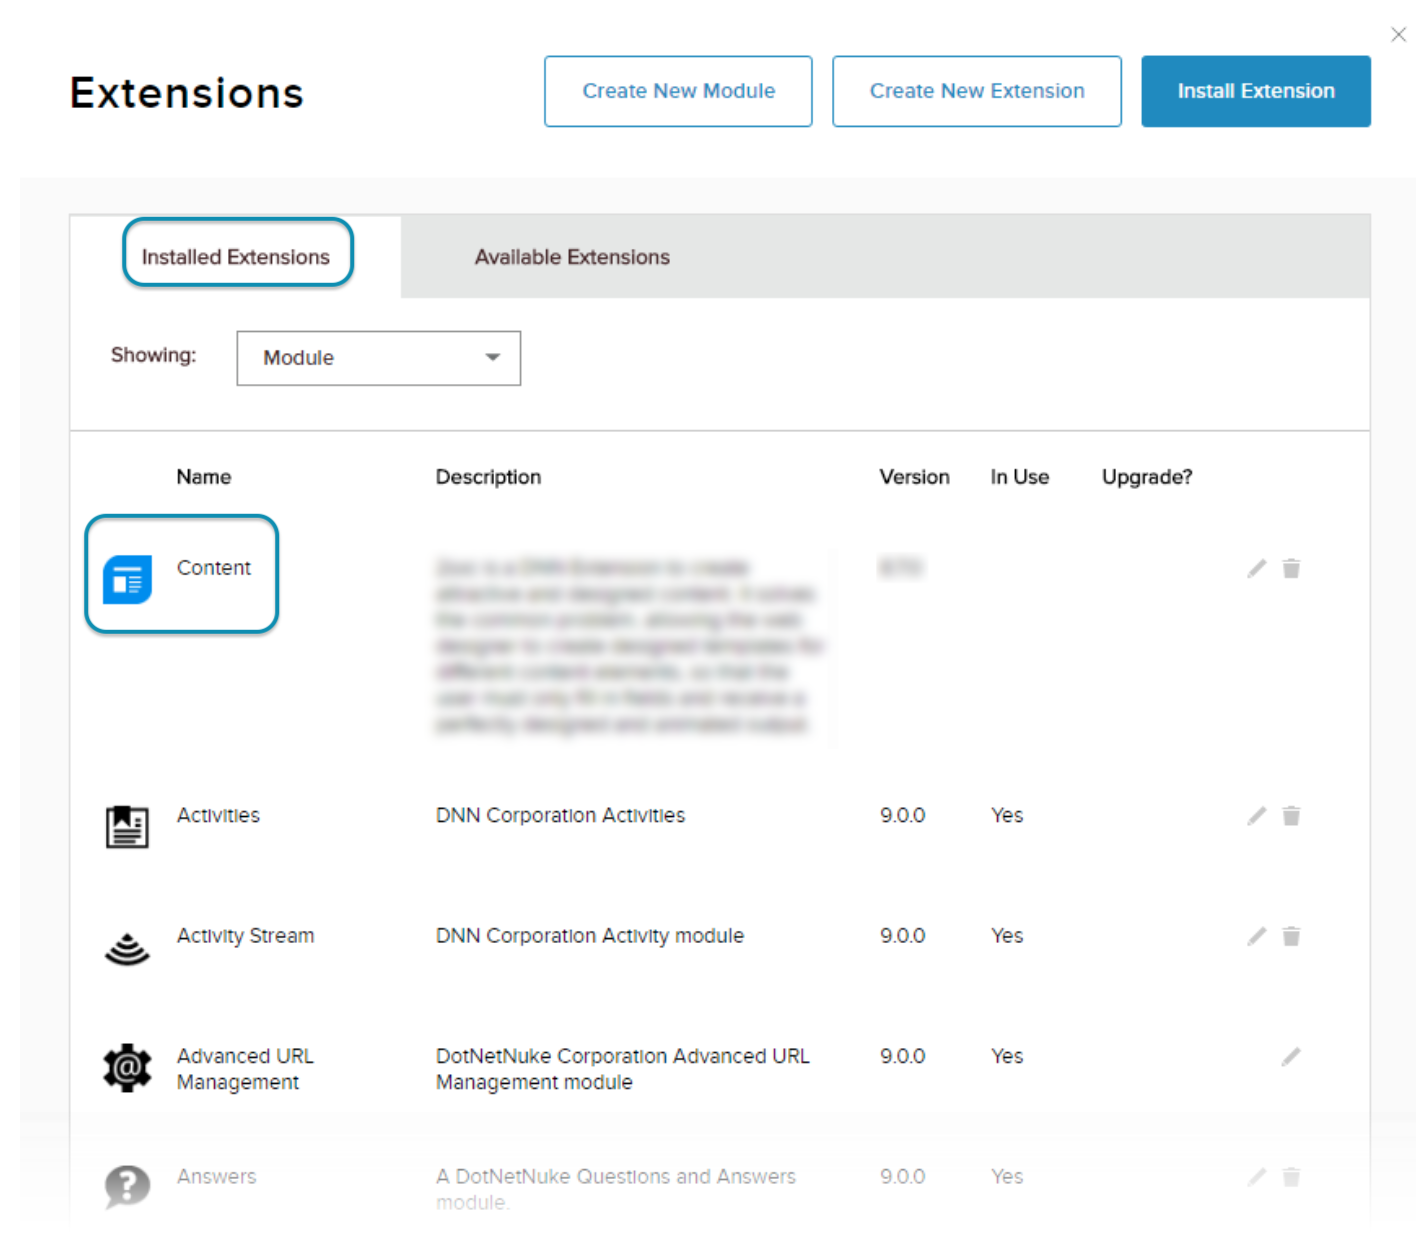
Go to Persona Bar > Settings > Extensions.
-
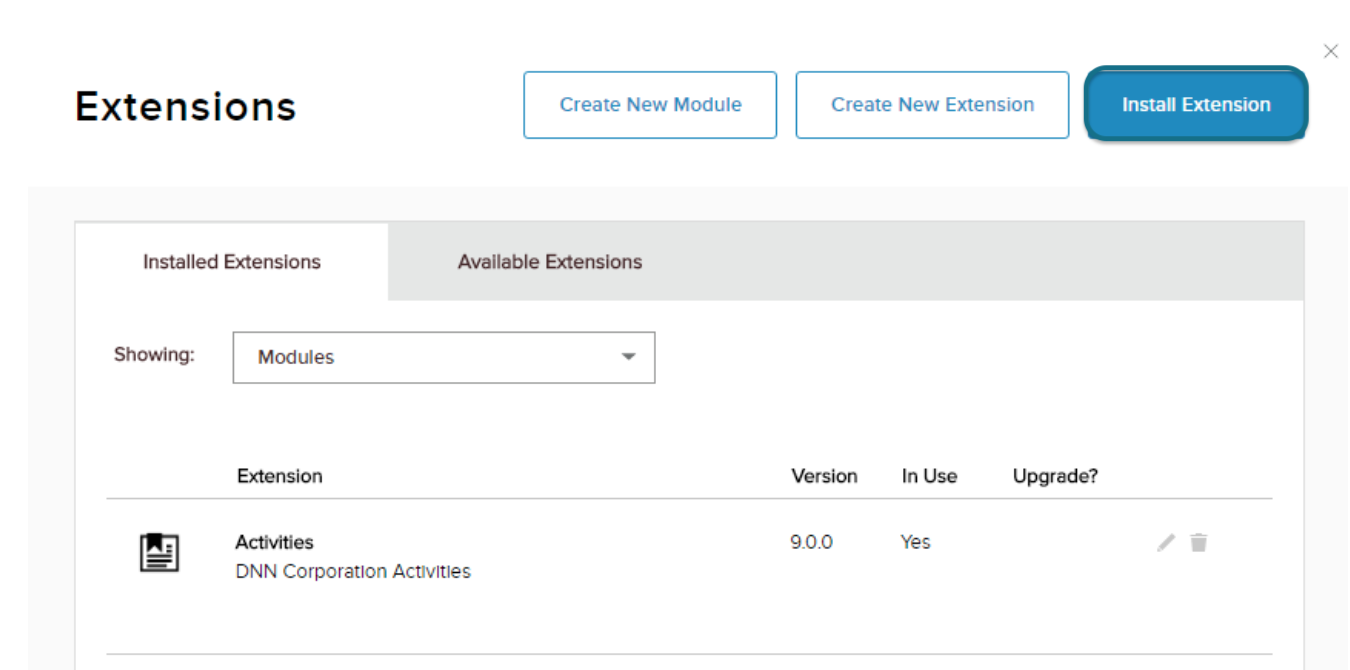
Click Install Extension.
-
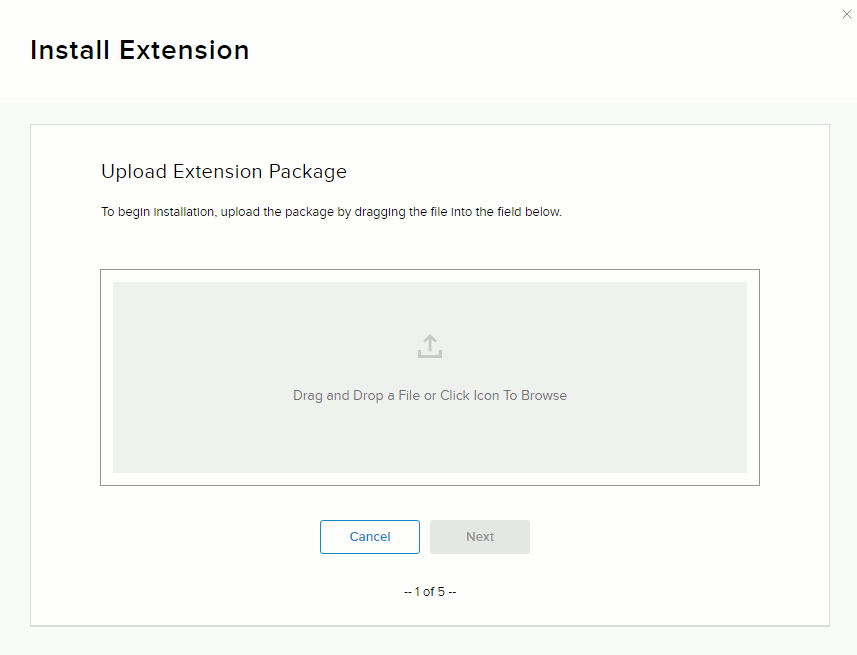
Upload the .zip file containing the extension package.
-
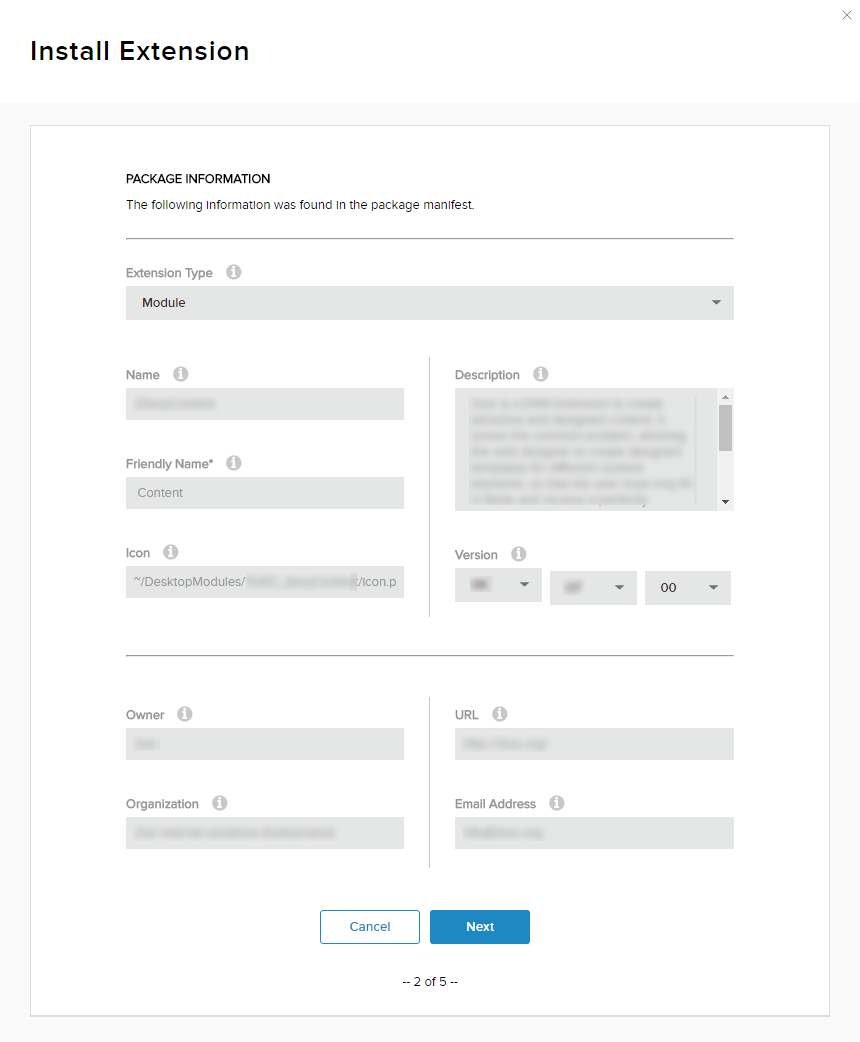
Informational pages will be displayed one after the other:
-
The Package Information includes the extension's version and description, as well as information about the creator. Click Next.
-
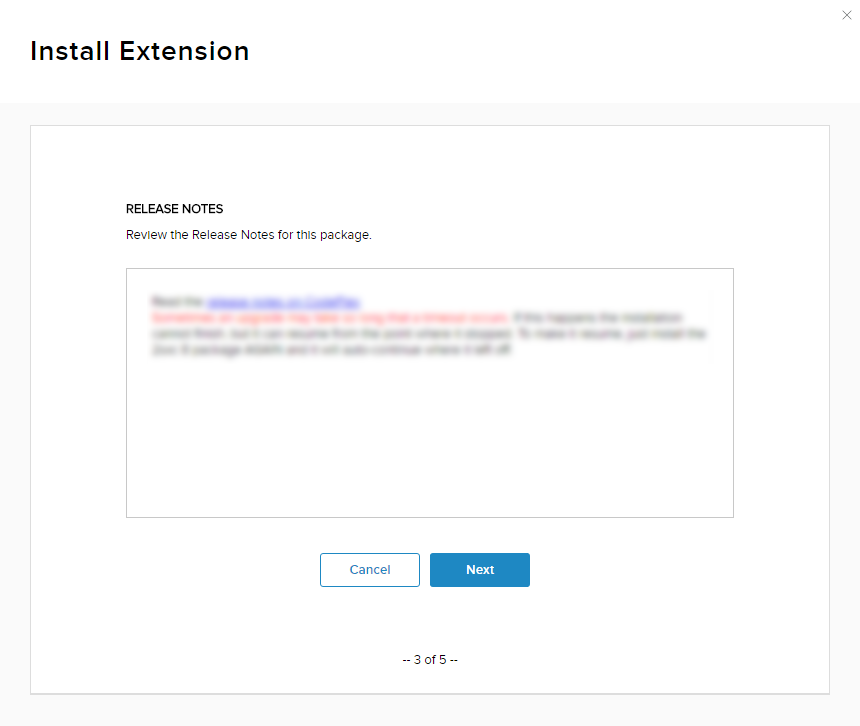
The Release Notes displays what's new in the current release of the extension. Click Next.
-
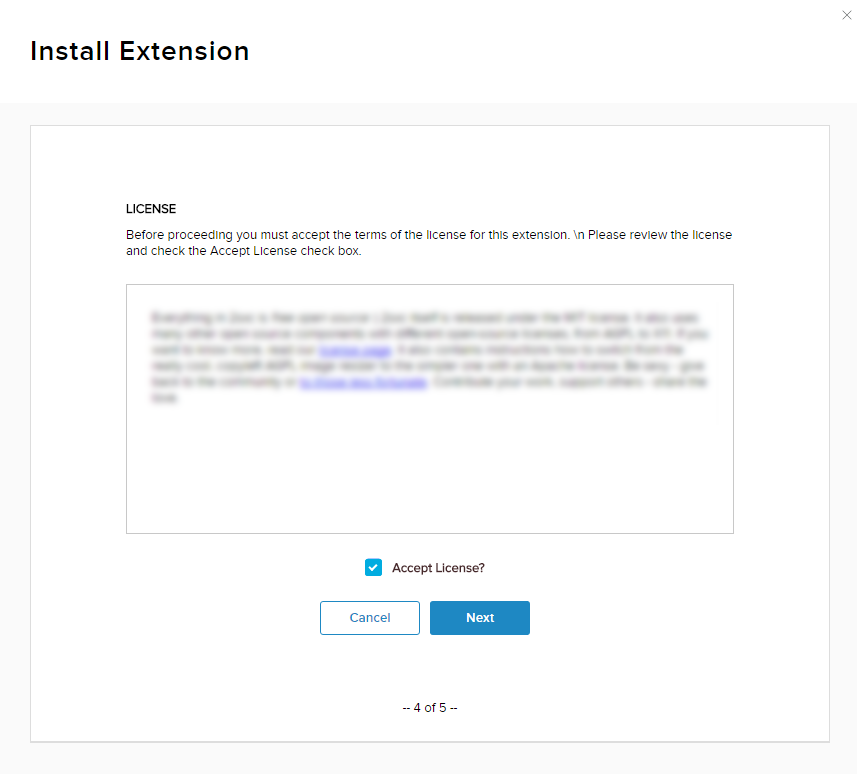
The License displays the creator's license terms. Accept the license then click Next to continue.
-
The Package Installation Report displays a log of actions performed by the installation. Click Done.
-
-

Confirmation
The installation is successful when the extension appears in the list under the Installed Extensions tab.
Parent Topic
Related Tasks
Related Information
- DNN Requirements
- Setting Up DNN
- DNN Community blog: Installing Our Module in Another DNN Instance by Clinton Patterson
Related Site
Priyanka Bhotika
Comments